Sunday, August 14, 2011

Daring Cooks' Challenge: Appams and Curry


Mary, who writes the delicious blog, Mary Mary Culinary was our August Daring Cooks’ host. Mary chose to show us how delicious South Indian cuisine is! She challenged us to make Appam and another South Indian/Sri Lankan dish to go with the warm flat bread.

The Daring Cooks really challenged me again, taking me out of my baking shell. but it was a great challenge, especially since i love indian food. making indian food from scratch was almost out of the question for me though. it seemed too complicated for me, especially with the long list of ingredients and spices used in the recipes. so, as always, i was pretty nervous taking on this month's challenge but, yet again, i managed to pull through and made delicious appams with sri lankan beef curry that even my picky dad really enjoyed. 

Ingredients
original recipe says this makes about 15 appams, but mine only made 8...
1 1/2 cups raw rice, soaked in 4 to 5 cups of water for 3 hours and drained
1 1/2 teaspoons dry active yeast
2 teaspoons sugar
1/2 cup water, room temperature
1 1/2 tablespoons cooked rice
1/2 teaspoon salt
1/2 cup thick coconut milk, from top of an unshaken can

1 1/2 tablespoons cooked rice

1/2 cup coconut milk, from top of an unshaken can
dissolve sugar in the room temperature water (important! the yeast will be slow-acting in cold water yet die in really hot water)  

 add the yeast and leave in warm area for 10-15 minutes until frothy 

 i slightly slowly stirred it after nothing really happened in 5 minutes...it had that yeast smell, which is good, but it didn't get as frothy as i hoped...

 take the drained raw rice and grind with the yeast mixture until smooth.
i used my mom's monster mortar and pestle!...but it was taking too long and the yeast mixture was splashing everywhere so i just busted out my mom's blender after awhile. 

add the cooked rice and grind to combine. the consistency should be thick and not too smooth.

 pour the batter into a large bowl and cover in a warm place for 8-12 hours to ferment the yeast!

 yess!! it's totally supposed to look like that! so beautiful. 

 add the coconut milk and salt to make the batter a little thicker than milk. 

 mix that around and let it rest for half an hour or until bubbles are formed when stirred.

 like these sexy bubbles!! 

wipe some vegetable oil with a paper towel onto a nonstick pan and heat it on medium heat.

 ladle some batter ( i think i might have put in about...2 tablespoons...or 3..the first couple of times were just test-runs for me, just figuring out how much to put on the pan to make perfect ones) 

 then immediately swirl the pan around to distribute the batter evenly to make an almost perfect circle...this was my first attempt. the batter stuck to the pan so quickly, i couldn't swirl the batter fast enough to coat the whole pan. but after the first two times, i got the hang of it, quickly ladling the batter into the pan with one hand and swirling the pan right away with the other hand. 

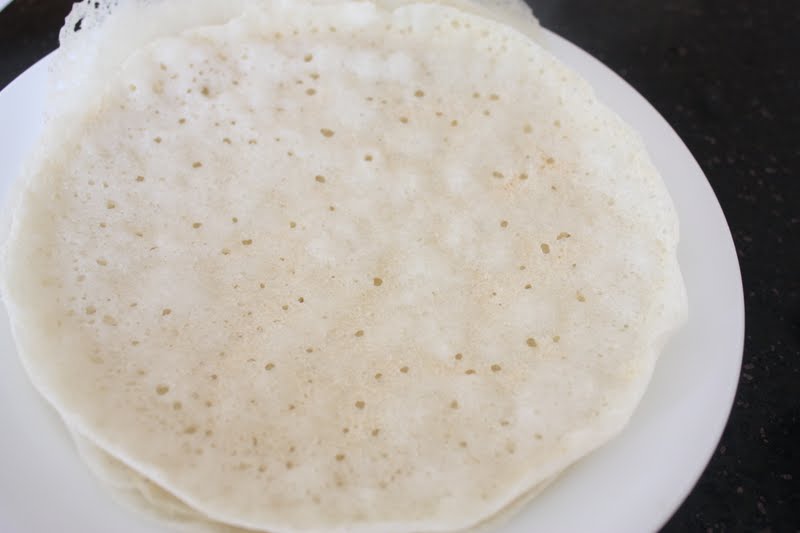
 cover the pan and cook for two minutes. the center should puff up and be shiny...except mine didn't really do that. but it should be dry to the touch. if it's still slightly wet and spongy, the yeast didn't really cook fully though, making the appam taste like raw yeast. 
i made mine pretty crispy all over because i preferred crispy over soft.

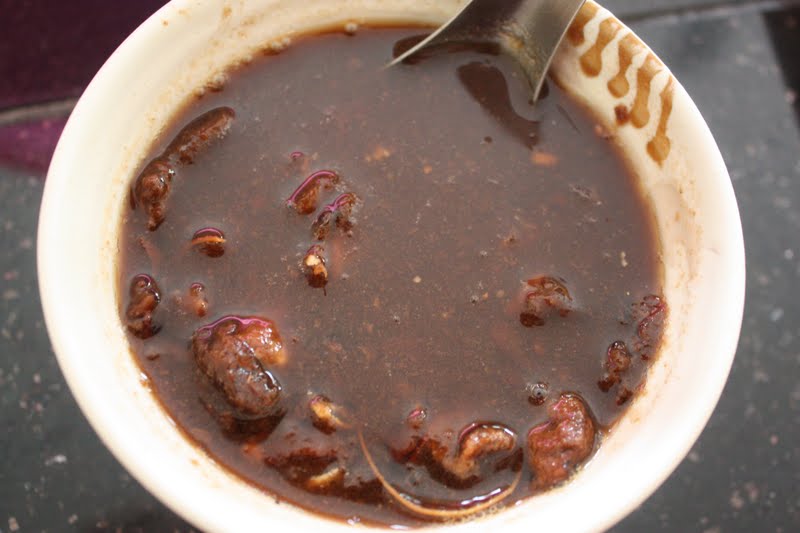
then serve immediately! with some curry! 


Sri Lankan Beef Curry!


I had never made successful beef curry before, so this is pretty exciting for me. the only hard part of this whole adventure was getting the ingredients, but even that wasn't too bad, with the little help of the Bharat Bazaar a couple blocks from my house. the process of cooking this was so easy though, and the flavor was amazing, so it's definitely worth making this again!
i also doubled the recipe when i made this, since i was making this back at my hometown, which meant i had to feed my brother and my parents, and they sure eat alot. another thing too, the recipe called for cayenne chili peppers but i couldn't find them...so my mom just gave me regular-looking chili peppers.

Ingredients 
serves about 5-6 
2 pounds boneless beef
vegetable oil
20 fresh curry leaves
2 chili peppers
2 cups finely chopped onion
2 teaspoon turmeric
salt
1 cup coconut milk
2 tablespoons tamarind pulp
1/2 cup hot water

 for the dry spice mixture:
2 tablespoons raw white rice
2 tablespoons coriander seeds
2 teaspoons cumin seeds
2 1-inch piece cinnamon sticks
seeds from 2 pods of green cardamom

cut beef into 1/2 inch cubes

roast the dry spice mixture over medium heat for 3-4 minutes. stir continuously to prevent anything from burning. i kept it on the heat until the rice started getting some color.


then grind into a powder


like this.


soak the tamarind pulp in the hot water 

in a large wide pot, add oil just enough to cover the bottom of the pot and heat over medium high heat.
add the onions and stir-fry for a minute

finely chop the chilis

and add the chilis, curry leaves, and turmeric into the pot with the onions and stir-fry for 3 minutes

i stirred until it looked like this, when the onions look slightly translucent and the curry leaves are softened.

add the meat and salt and cook until the meat is browned on all sides, about five minutes.

yumm. just like this!

add the dry spice mixture and stir to coat.

then add the coconut milk and stir to coat (i stirred the coconut milk well in the can before measuring out the 1 cup of coconut milk)

reduce heat to medium and cook for ten minutes, stirring occasionally.

first i pressed down on the tamarind pulp with a spoon against the sides of the bowl... 


then strained the soaked tamarind into 3 cups of water

 add the tamarind mixture to the pot and bring to a boil

after bringing to a boil, lower the heat to a strong simmer and let it simmer, uncovered, for an hour, until the meat is tender and the flavors are blended.
i let it simmer a little over an hour, probably an hour and ten minutes, because i wanted it to be slightly on the thick side...but not too thick. just not watery. 

then taste and adjust the seasoning. my dad made me put fish sauce in it because he adds fish sauce in everything. 
and enjoy!!


Monday, August 1, 2011

Truffle Cookies


there's this great chocolate and dessert shop called Ginger Elizabeth in Sacramento that my cousin told me about. they have a great selection of truffles, perfectly baked macarons, cakes...and these melt-in-your-mouth truffle cookies that my friend is really crazy about. so when i saw that a recipe card for the truffle cookies was available in the shop, i decided to take one so i can make them for my friend! these are not for the faint of heart--these cookies are so chocolate-y, i started getting slightly dizzy after eating just one...but they were so, so good... 
i followed the ingredients on the recipe card, but i didn't really follow the instructions on how to make them exactly...first of all, it called for at least 72% cocoa content for the chocolates but i used 73% from Trader Joe's and leftover 60% ghirardelli chocolate chips from safeway. also, i refrigerated my dough for about 70 hours...because my friend wasn't able to visit me on wednesday so i waited until friday afternoon to bake the cookies so i could bring them to my hometown. plus there's a huge craze over NY Times' Quest for the Best Chocolate Chip Cookie, which stated that refrigerating your cookie dough for 12-72 hours will produce a wonderful cookie that is crispy on the outside and chewy on the inside because it allows for the cookie to be baked evenly throughout. according to the article, giving the dough lots of time in the fridge makes the dough drier, as the dry ingredients soak up all the wet ingredients! it's such a great article!! i think i read it more than twice :D so refrigerate the crap out of your cookies!...(but no longer than 72 hours...) and be in awe of the voluptuous sexiness!

Ingredients
8 ounces chocolate, 72% cocoa (i used 73% from Trader Joe's)
4 tablespoons butter 
2 eggs
3/4 cup lightly packed brown sugar
1/2 cup + 2 tablespoons all purpose flour
1/4 teaspoon baking powder
1/4 teaspoon salt
1/2 teaspoon vanilla
1 cup chocolate, 72% cocoa (i used mostly my leftover 60% ghirardelli chocolate chips and two squares of the 73% chocolate from Trader Joe's)


 cut the butter up in pieces so it can soften faster.

melt the 8 oz. chocolate on a double boiler

 then when my butter was ready, i slowly poured in my chocolate and beat the mixture together for a couple of minutes.

 then i used my rubber spatula to bring everything together mmm. 

 i set the chocolate/butter mixture aside and beat my eggs, brown sugar, and vanilla extract, until it was a really pale yellow. this also helps the cookie from being flat and lame-looking (i'm so obsessed with preventing my cookies from being so nasty flat because the last time i made cookies...that's exactly what happened...and i assume it's because i didn't cream the butter enough until it was light and fluffy and i didn't beat the eggs until pale yellow) 

 then add the chocolate mixture into the egg mixture and beat

 i beated it for a little, and then i used my rubber spatula to get everything together 

 yay! well mixed!

 i sifted the flour, baking powder, and salt together 

 and folded the dry ingredients in three additions very, very gently into the chocolate mixture, just until i stopped seeing white flecks.

 after the third addition of the dry ingredients, i stopped folding when there were some hints of white present...

 and then added the chocolate chips (so i won't have to be mixing this batter excessively..which probably contributes to a flat cookie...)

 yum..so chocolate-y, it's amazing.

 i transferred the batter into a smaller bowl (look how sexy it looks!!)

 and wrapped in saran wrap twice. i left it in the fridge for 70 hours!

 after the 70 hours, i placed wax paper on my sheet pan and quickly scooped out some batter with my ice cream scoop!

 i flattened them a little...and put them in a 350 degree oven for 8 minutes. 
when it's been in the oven for 3-4 minutes, i turned the pan 180 degrees for even cooking! 

the cookies were big and thick, the insides were melt-y, even a day after it was made. personally, i liked these cookies a day after they were baked, simply because the whole cookie solidified more, making it taste more like a cookie than a melted brownie. but these cookies were basically like cookie brownies...crownies.